Learn the science behind:

How to Make Fudge – Controlling Crystallization
Making fudge is all about controlling the crystallization of sugar. Dissolve the sugar first and then make sure it crystallizes in just the right way to make some melt-in-the-mouth fudge. It only becomes easier when you understand the science behind it.
So grab some bags of sugar, your thermometer & a stand mixer and you’re ready to go!
What is fudge?
Fudge is a type of sugar candy. Its core ingredient is, yes, you guessed it: sugar!
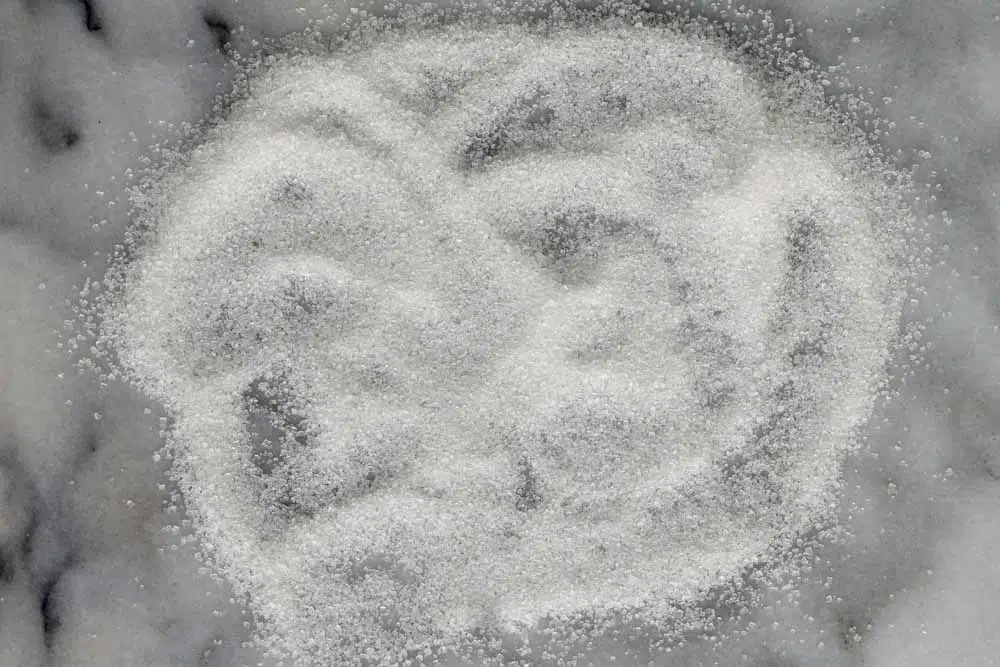
Full of tiny sugar crystals
More specifically, it’s a crystalline type of sugar candy. This means that the candy contains a lot of – tiny – sugar crystals. These sugar crystals are crucial for making fudge fudge. The crystals make the fudge a little grainy, without being chunky or gritty. They make the fudge melt in your mouth. And, they make it easy to cut, or break fudge, even though it’s a sturdy product!
How to make fudge
Like many other candies, fudge is all about controlling sugar. When making fudge, we want to make the sugar crystallize into countless tiny, smooth crystals.
So, how do you do that?
Step 1: Dissolve the sugar
It starts by dissolving sugar, so the exact opposite of what we want to achieve in the end!
The sugar you’ll be using to make fudge, whether it’s granulated sugar or caster sugar, is made up of sugar crystals. However, these sugar crystals are quite large. Sugar crystals this size would make a very gritty fudge.
That’s why you will first need to dissolve the sugar crystals. We want to get rid of all these large crystals, to be able to make smaller ones later.
Dissolve it in cream
Aside from those tiny sugar crystals, fudge also contains a good amount of fat. Fat makes the fudge creamy. It’s why you don’t just dissolve the sugar in water. Instead, you dissolve the sugar in cream, alongside maybe some milk. Cream contains over 30% of fat, so helps create that rich texture.
To add even more fat, you also add butter to the fudge mixture. Butter contains about 80% milk fat, so adds even more creaminess. Some fudge recipes will say to add the butter at the start, others will have you add it at the end.
Controlling the fat content
You can play around with the ratio of sugar : cream : butter. Adding more butter and cream makes a creamier fudge. Adding less makes a slightly more firm, sugary fudge. Experiment to find your ideal ratios. But, do keep in mind that there should be enough moisture at the start to dissolve all the sugar. It’ll be tricky to make fudge with just butter & sugar!
Step 2: Heat it up!
Once you’ve mixed your ingredients, it is time to heat the mixture. This is a crucial step of fudge-making where you’re trying to achieve a few things.
First of, you’re ensuring that all the sugar has dissolved. At a higher temperature, you can dissolve more sugar, more quickly. Think of dissolving sugar in a hot cup of tea versus a cold glass of water. It happens a lot faster in the hot water than in the cold!
Next, once it’s boiling, you’re evaporating water. By evaporating water, you’re increasing the concentration of sugar in the mixture.
Temperature control is crucial
This is also where the science kicks in! Boiling sugar solutions is the key for a lot of different types of candy. How long you boil them for determines the type of candy you’re making.
The longer you boil, the more water you evaporate. The more water you evaporate, the hotter the sugar solution in your pan becomes. The temperature of a boiling sugar solution and its concentration are directly linked. So by measuring the temperature, you have a good measure for the concentration of the solution.
If you don’t boil the mixture to a high enough temperature, it won’t be concentrated enough. The final candy will remain too liquid. On the contrary, if you heat it too much, it will become rock solid. In both scenarios, you won’t be able to make fudge. But why?
Creating a supersaturated solution
When you make fudge you want to make a sugar solution that contains so much sugar that it no longer is stable. That is, it contains more dissolved sugar than is energetically stable. As a result, the dissolved sugar will want to recrystallize again. Scientists call such a solution supersaturated.
So how do you make a supersaturated sugar solution?
Know that you can dissolve more sugar in water at high temperatures, than you can at low ones. Also, know that when a sugar solution is boiling, it is automatically at its maximum possible concentration of sugar.
So, whereas all the sugar may be dissolved when your solution is boiling at 110°C (230°F), once you cool it down to room temperature, the sugars no longer ‘fit’! By boiling and then cooling a sugar solution you’ve created a supersaturated sugar solution.
We need an excess of sugar molecules
When you’re making fudge you want to create a lot of tiny sugar crystals. However, if at all possible, the sugar molecules will want to remain dissolved in water. They will only crystallize if they can no longer fit.
Since we need a lot of these sugar crystals, we need to make sure that our sugar solution contains a lot of sugar molecules that no longer ‘fit’.
Over the years, candy makers have learned that cooking a sugar solution to 115°C (239°F), plus or minus a few degrees, will make exactly the type of sugar solution that we need to make fudge!
Step 3: Cool, Stir & Crystallize
Just because you’ve made a supersaturated sugar solution does not mean that tiny crystals will form spontaneously. You still have to guide them. This is where the next step comes in: cooling & stirring.
It needs to cool to crystallize
Recall that our hot boiling sugar solution becomes supersaturated when we cool it. The colder it becomes, the more supersaturated it becomes. In other words, more sugar molecules will want to form crystals.
Stirring encourages crystallization
Some will start forming crystals spontaneously. However, you can encourage them to form by stirring the mixture. This way you’re helping the sugar molecules to meet each other and form a sugar crystal.
What’s more, stirring helps to break larger sugar crystals into smaller ones. It prevents the formation of just one or two very large crystals. Instead, you’re making a lot of small sugar crystals.

The fudge hardens
During this last step, you will notice that the fudge turns from a liquid into a thicker mass. This is because of the formation of all those sugar crystals. Sugar crystals are a lot harder than dissolved sugar in water.
You will also notice that the fudge mixture loses its gloss and shininess at this point. Again, that is a good sign. It is a sign that sugar crystals are forming. These reflect light differently, causing these visual changes.
Storing Fudge
Sugar crystallization takes time. As such, right after you’ve made your fudge it probably is still soft. You’ve created the first batch of sugar crystals. The rest will grow over time. So take at least a few hours after you’ve made the fudge before eating or wrapping it. It will continue to harden out.
It doesn’t spoil easily
Fudge contains a large amount of sugar. So much so, that most microorganisms don’t like growing on fudge. The water activity is too low. You can store many types of fudge outside the fridge for weeks, if not months. It’s a perfect treat for hot climates.
But can develop off-flavors
That said, fudge can deteriorate over time. Most fudge contains a good amount of fat, mostly butterfat. Fat makes the fudge creamy and rich in texture. However, butterfat can also go rancid. Rancid butter doesn’t smell, nor taste good. Luckily, the high sugar content in the fudge does slow down this process. But, it won’t stop it.
By using other fats that are less sensitive to turning rancid, you can increase the shelf life. Generally, these would be harder fats, such as coconut fat, or shortening. Do keep in mind that they will also change the texture of the fudge.
Freezing fudge
Fudge can be frozen very easily! There’s nothing that can be broken down in the freezer, or be affected by ice crystals. It is important though that you wrap the fudge tight. As with any product, you don’t want freezer burn.
Freezer burn occurs if moisture from the fudge evaporates in the freezer. This may sound contradictory. But, water does evaporate in the freezer, be it very slowly. Tightly wrapping the fudge prevents this though.
Troubleshooting fudge
Making fudge is all about controlling crystallization. Not controlling the crystallization well is the root cause for many problems when making fudge. Here we’ll discuss a few common problems when making fudge.
Why is my fudge so soft?
Fudge becomes hard because of the crystallization of sugar. Crystalline sugar is a lot harder than dissolved sugar. So, if your fudge is too soft it probably doesn’t contain enough crystallized sugar compared to the other ingredients.
You can resolve it by:
1) Lowering the amount of butter (butter is quite soft compared to sugar crystals)
2) Slightly increasing the temperature to which you boil the sugar solution
3) Stir for a longer period of time before you deposit the fudge, to encourage more crystals to form.
Another reason your fudge can remain soft is if you’ve used butter. Butter may remain soft at room temperature, especially in warmer climates. You can easily fix this by placing the fudge in the fridge for a few hours. If it hardens out, you know it was the fat that kept it soft.
Why is my fudge grainy?
A good fudge should be a little grainy. It’s a sign that it contains those sugar crystals. However, it should not be gritty, or crunchy, or excessively grainy. If that has happened, you probably have a couple of quite large crystals in your fudge.
Try stirring the fudge for longer during cooling, to ensure the formation of a lot of small crystals.
The outside of fudge can become more grainy over time if it dries out. Prevent this by wrapping the fudge well.
Why does my fudge stay liquid during stirring & cooling?
If your fudge remains liquid that means sugar isn’t crystallizing. There are a few ways to control this:
1) Cook your mixture to a higher temperature. This way you increase the sugar concentration. This makes it more likely to crystallize.
2) Ensure you haven’t added too much of ingredients that inhibit crystallization. A common example here is corn syrup. If you’ve added too much, it can prevent sugar from crystallizing at all!
3) Do not add acids to your fudge during cooking. Trying to make a lemon fudge? And added some acidity to your sugar mixture during cooking? That has caused your sugar to break down, creating invert sugar. Just like corn syrup, invert sugar prevents or slows down crystallization. Not something you want to happen. Add any acids after cooking.

Want to make fudge together?
You’re in luck :-). We hosted a live fudge making class and you can still get access to the recording. Together, we’ll discuss the ins and outs of making fudge and we’ll make a batch of fudge to get you started out right!

Creamy Vanilla Fudge
Yield:
16 portions
Prep Time:
15 minutes
Cook Time:
20 minutes
Additional Time:
20 minutes
Total Time:
55 minutes
Making fudge is not complicated, nor a lot of work, especially once you understand what it is you're trying to do. Life becomes a lot easier though if you have a stand mixer and thermometer, which we're assuming you have for this recipe.
This recipe is a modified version of a BBC Good Food recipe.
Ingredients
- 140g sugar (e.g. granulated sugar, cane sugar, or brown sugar)
- 130g heavy cream
- 10g unsalted butter
Optional
- 1/4 tsp of vanilla
- 25g roasted walnuts or pecans
Instructions
- Add the sugar, cream, and butter to a pot and bring it to a boil gently. Stir a few times to help dissolve all the sugar.
- Turn the heat to medium/high and continue cooking the mixture. Place a thermometer in the pan to control the temperature, hitting the right temperature is crucial for making fudge as we discussed in the article.
- Continue cooking until the mixture reaches 116°C (241°F).
- Turn off the heat and pour the hot(!) mixture into the bowl of your stand mixer. (Make sure your bowl can handle the heat, preferably use a stainless steel version. If you're in doubt leave the mixture to cool down in the pan for a few minutes to get rid of the most intense heat.)
- Place the bowl in your stand mixer and attach the paddle attachment.
- Optional: now is the time to add your vanilla extract or roasted nuts
- Set the mixer at its lowest speed.
- Initially, nothing seems to happen. You're just mixing the sugary, creamy mass.
- After some time, the mixture will start to lose its gloss and become a little lighter in color. This is when the sugar starts to crystallize! It will probably start when your mixture has cooled down to approximately 60°C (140°F).
- Just continue to mix for some time. You'll notice that it will start to thicken. If it does, it's time to take it out before it becomes too firm. The fudge will still be warm, but should no longer be hot.
- Pour the fudge into a tray lined with parchment paper.
- Refrain from eating it! The sugar will continue to crystallize and the fudge will continue to harden. It's best if you leave it so set for another 8 hours or so.
- Cut into pieces and enjoy!
What's your challenge?
Struggling with your food product or production process? Not sure where to start and what to do? Or are you struggling to find and maintain the right expertise and knowledge in your food business?
That's where I might be able to help. Fill out a quick form to request a 30 minute discovery call so we can discuss your challenges. By the end, you'll know if, and how I might be able to help.


Interesting recipe – thank you! I’ve only made chocolate fudge in the past, and the recipes I’ve used all say to let the mixture cool, undisturbed, to around 110F before beating. Is this to control crystallization of the cocoa butter, rather than controlling the sugar?
Hi!
It’s most likely both. Cooling down the sugar before starting to stir makes it easier to crystallize in small crystals and when making big batches it’s definitely best to wait a little while.
At the same time, set cocoa butter definitely helps with setting the fudge. Even if crystallization doesn’t happen properly, the fudge will set (which is probably why so many online fudge recipes use chocolate, it’s a bit of a fail safe). When the cocoa butter sets the consistency changes and I can imagine this can also help in stirring the mass without it splatting everywhere. Though you wouldn’t have to wait for the cocoa butter to stir, that will set solid regardless of the temperature.
Hope that makes sense!